
Create Operator
To create operators through the menu, we press the ‘+’ button, which is located in the upper right corner.

When you press the button, a form is displayed to enter the operator’s basic data.
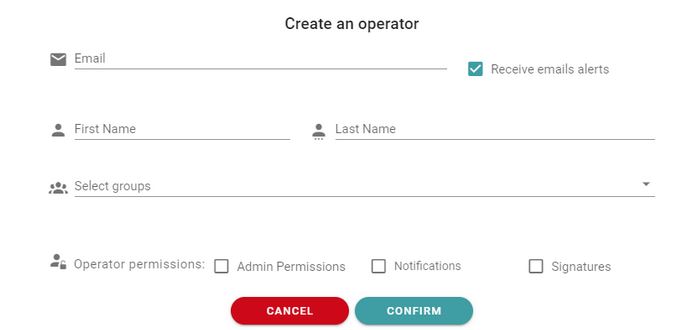
The email is the fundamental data because it is the user with which the operator will access the platform and where he will receive the emails that GoodOk will send him, starting with the welcome email with the randomly generated password. The email must be unique in the system, there cannot be two operators with the same email.
Name and surname are data to facilitate identification in any section where an operator appears: responsible for a notification, author of some action, etc.
The Receive notifications by email option allows you to define whether or not the user will actively receive notifications from the application in the event of certain events. The user can always modify these notices in the configuration section.
The Select groups option only appears if at least one Group has been configured in the Groups section. In that case, the Operator can optionally be assigned to a Group so that the company restrictions and filters defined for it apply. See the Groups section of the documentation to understand how Groups work and the implications for configuring Operators.
If we do not select any service, a user will be created in GoodOk but when they enter the application they will not be able to perform any action.
Administrator Permissions can only be selected associated with a service.
Once the data is completed, with the ‘confirm’ button the data is saved and the operator is created.
If any of the services is selected, the form window expands to allow you to configure the service details.
When Notifications is selected, the form allows you to configure the following elements of the service:
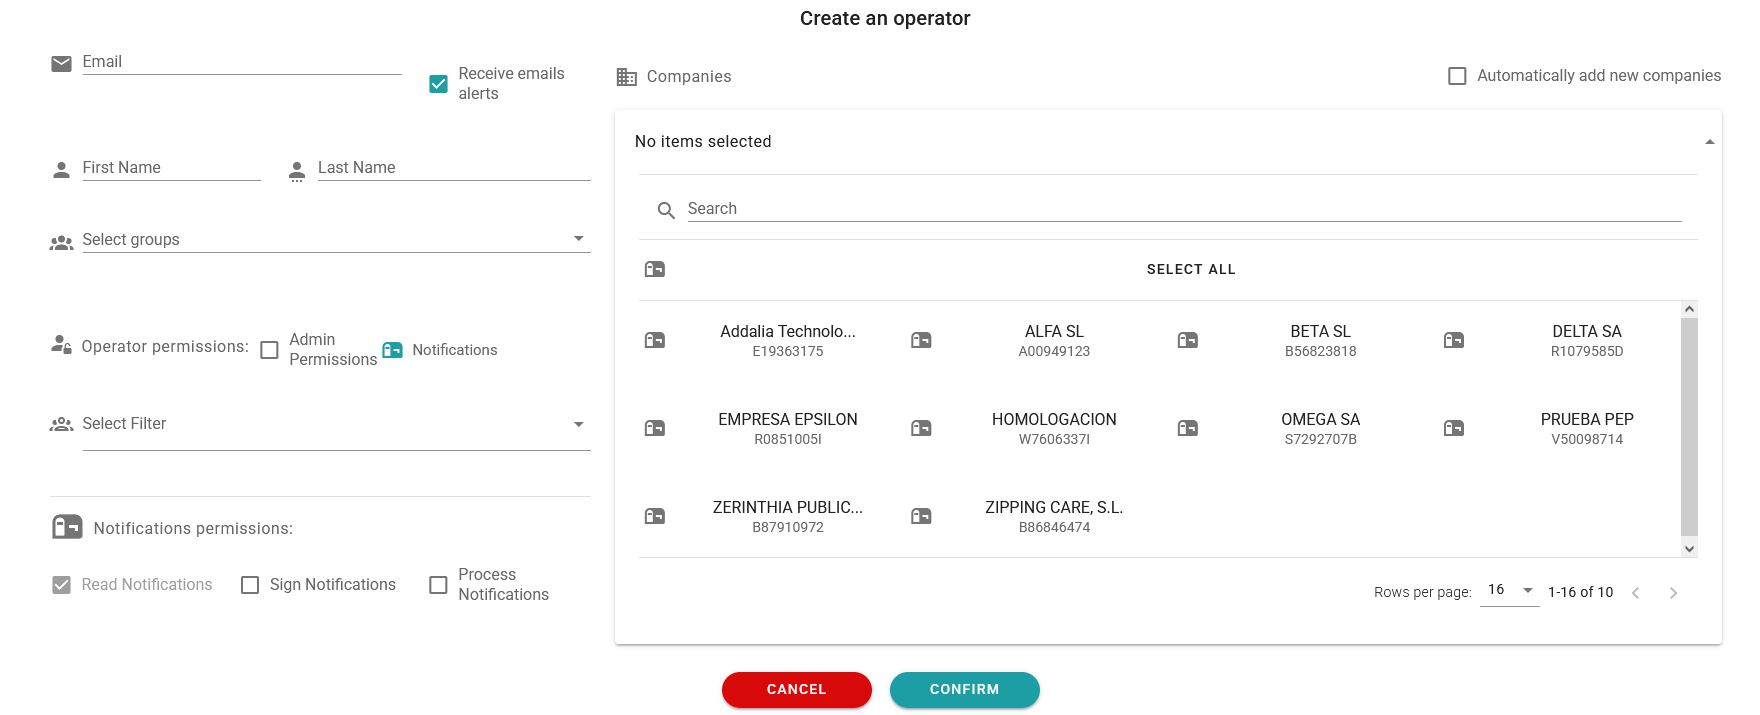
To configure the notifications that we want the operator to be able to manage we have to configure 3 elements:
- Companies
- Filters
- Notification permissions
Companies
On the right side of the form all the companies that we have registered in the COMPANIES section are shown. By clicking on any of them, we add it to the list of companies from which the operator can see the notifications that meet the filters we choose.
The added companies are collected in a list at the top, and are marked in the general list. You can remove a company either from the list at the top by clicking on the x, or from the general list by clicking again on a selected company.
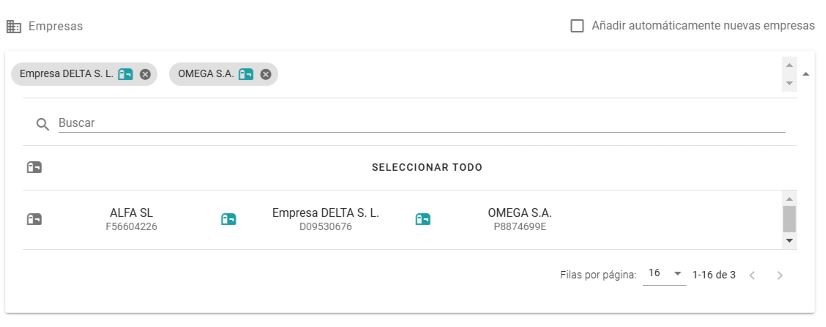
With the search engine you can search for companies by name or by CIF/NIF.
If the Automatically add new companies option is checked, when a company is added to the company list, it will be automatically added to the operators who have this option selected.
When a company is deleted from the company list, it will be removed from the company list of all operators that have it included.
Filters
An operator can only see notifications from companies on their list that meet any of the filters they have configured.
To do this, in the Select a Filter section of the form, a drop-down menu opens with the filters that can be chosen.
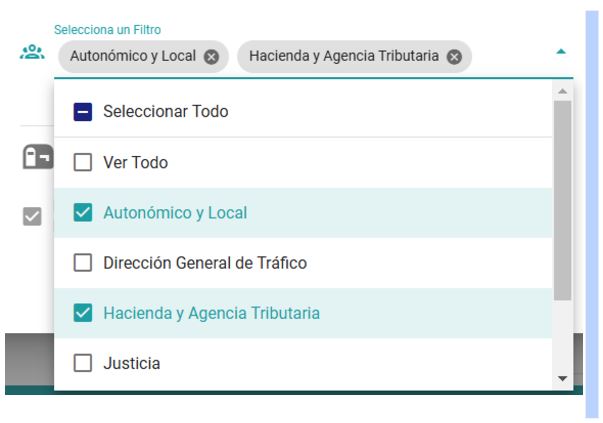
The chosen filters are shown at the top, as well as highlighted in the list and with the selector checked. Filters can be removed either by clicking the x in the top list or by unchecking it in the general list.
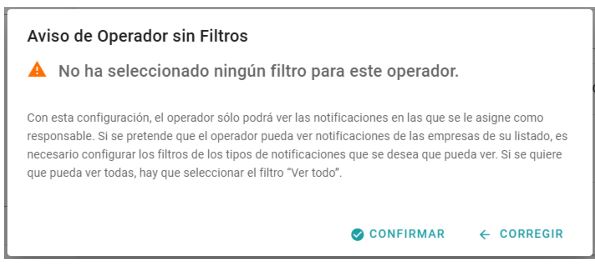
If no filter is chosen for an operator, the operator will not be able to see any notifications from any of the chosen companies except the notifications for which they have been designated as responsible. See assignment of responsibilities in the Notification Responsible section in the Notifications menu.
The View All filter allows the operator to view all notifications that arrive for the companies on their listing.
If you have not chosen any filter and press confirm, an alert window will be displayed to ensure that it is the desired configuration for this operator and the consequences.
Notification permissions
There are three permission options for the actions that the operator can perform on notifications:
- Read Notifications: This option is always checked by default. It allows the operator to see the notifications, their status, information, documents, but does not allow them to perform any action on them.
- Signing Notifications: this option allows the operator to appear before the issuing administration of a notification that is in Pending status to obtain the documents and to pass it to the Accepted status with the implications of starting deadlines that may entail.
- Process Notifications: this option allows the operator to manage the notification to change its status, assign a person responsible, set alerts, share it by email or link, add observations and documents, etc.
Administration permissions are explained in the Administrator Permissions section.
Newsletter susbcribe
Receive all the news and updates about GoodOK in your email.